Showing posts with label gold. Show all posts

Monday, March 16, 2015

St. Patrick's Day Fun!

St. Patrick's Day Fun!


  I know this is close to St. Patrick's Day, but thought I
would post anyway  just in case someone was looking for
some last minute ideas for their preschoolers!
Here we go!

Books

The Luckiest St. Paddy's Day Ever
Ten Lucky Leprechauns
Happy St. Patrick's Day Curious George
The Last Snake in Ireland

Crafts

Torn Paper Rainbows - Let them tear paper and glue into a rainbow (great motor skill)      

Rainbow Hats - Let each child cut one strip of each color of the rainbow.  Measure their head 
and staple a sentence strip into the band for the hat.  Let them color a pot of gold to be attached to the
front of the band.  While they color, you can staple the rainbow onto the front and backside of the band (creating a rainbow over their head. Let them add stickers or decorate their band while you cut out their pot of gold.  These are great to keep and wear if you go on a hunt for gold or for a leprechaun!                                            

Mixing Hands Rainbow - First, have child color their pot of gold to be cut out and attached to the white paper strip.  Next, have a sink or bucket of water ready and some towels.  Paint one hand red and press coming out of the gold.  Then paint their other hand yellow and press that where the third hand print would go.  Have them rub their hands together while saying:
                         Abracadabra, Alakazam......I'm going to find me some gold!
Then watch them be amazed that their hands have turned ORANGE!!!  LOL  They love it. Keep painting their hands and saying the chant until they have their rainbow completed.
                                                                        

Leprechaun Mask/Hat - Give each child a paper hat to color or decorate with shiny paper and whatever they would like.   Then give them a sheet of paper and let them cut little snips that whole way around to make a beard.....you can curl the pieces a bit.  Attach the beard to the hat with an opening for their face.  Attach the entire thing to a headband.  It is fun to take a picture of each student with the mask on and print them out and place on a bulletin board to see if they can guess who is who.                                           

Collage Shamrocks  - Give each child a cut out shamrock shape and place lots of different 
green collage items on the table (such as green foam, glitter, markers, yarn, stickers, tissue paper, etc).  Let them decorate it how they want using all green.  They can add a rainbow if they would like.
                                                                     

Shaving Cream Shamrocks - The picture shows a heart we were doing for valentine's Day, but you can do three hearts and let them glue them into a shamrock.  First put some shaving cream on a plate.  Next squirt green, yellow and blue coloring onto the shaving cream and use a craft stick to pull through the cream to mix the colors a bit.  Then take a heart shape and lightly press on the shaving cream.  Pull it up and then scrape off the excess cream...it will leave the coloring on the paper in a very cool design.  Glue your hearts together onto a sheet of paper and add a stem.


Paint Dotter Rainbows - use paint dotters on half of a paper plate to make a rainbow.
Add the things that you need to make a rainbow - sun and rain.  We added cotton ball clouds. One cotton ball per child was enough......they just pulled them apart into bigger sections.
                                                   

Shamrock Glasses - I had these made ahead of time for the kids to wear.  I used green tag board or cardstock.....folded it in half and cut out a shamrock shape and the ear piece and then unfolded.  The kids really liked them and they held up quite well. (Sorry the pic is blurry, but it is from 18 years ago, scanned and blown up LOL)


Centers & Activities

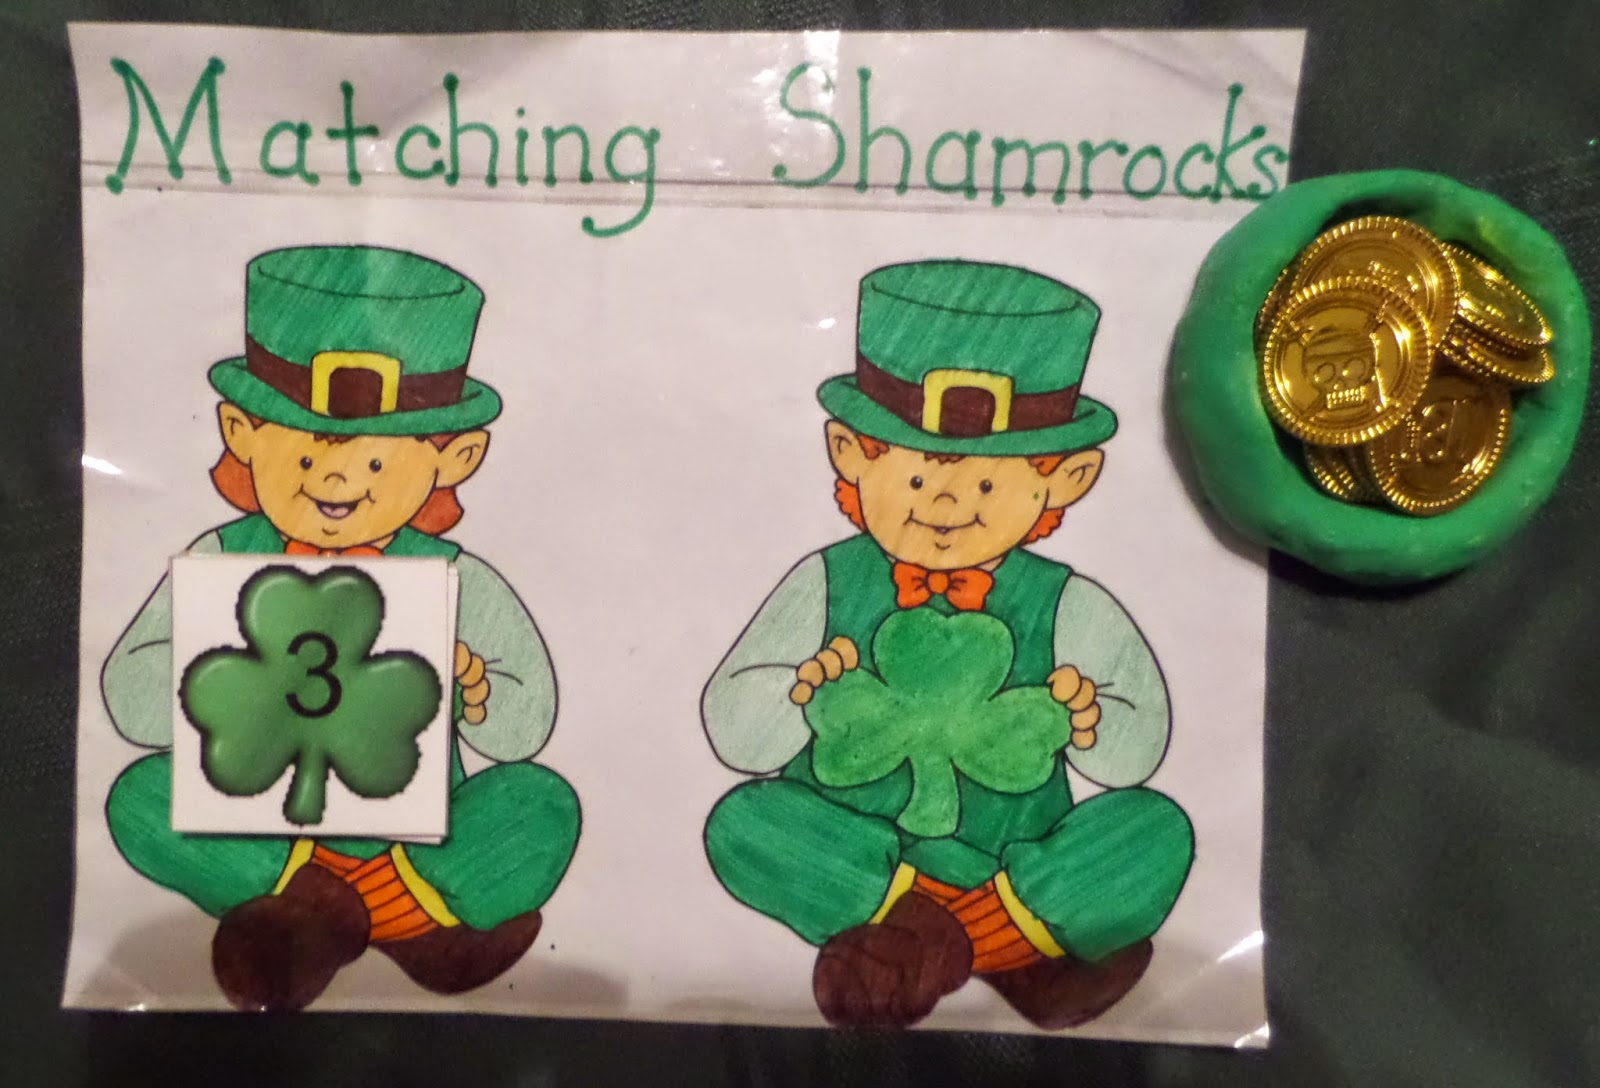
Matching Leprechauns - I printed out a sheet with two leprechauns and laminated.  Set a pile of numbered shamrocks on one leprechaun's belly and set out a small pot of gold pieces for your child to match the number of gold pieces to the card so they become twin leprechauns.  If the child does not know their numbers yet, they can turn the card over and count the dots on the back of the card.                                                                               


5 Little Leprechauns Flannel Story/Song - I printed out 5 leprechauns and other pictures to go with the song, laminated them and added velcro to the back because I still love flannel boards and think the kids do too!  You can do this activity during circle time and hand out a picture to each student to bring up to the board when it is mentioned and then you can also leave this out as a center for them to retell the story on their own with all the pieces.


Five Green Shamrocks Song - Once again, I printed shamrocks and laminated them and added a craftstick stem.  I had this little pot the I could stick them into, but you can take some green play-doh and put in a cup and that works just as well.  As you sing the song, add a child's name to come pick a shamrock....repeat the song until everyone has had a turn.


Blarney Stones (One to One) Activity - Use an ice cube tray (I just happened to have a green one - this pic is from our dinosaur week where they used the stones as dino eggs) and green gem stones to have them match one stone per cube space.
                                                          

Patterning, Sorting, and Sand Table - find lots of different green items, poms, shamrocks, gold, etc and these can be used at a center for sorting and patterning or in the sand table or sensory bin.  Children love to look for treasures as much as the leprechauns do!
                                                                     

Hot Potato - We use either a little leprechaun troll, a gold egg or even a piece of gold and play some Irish music while passing the object around.  The last child holding the treasure, is The Lucky Leprechaun!!                                                

Leprechaun Hat Game - This pic is from about 18 years ago of my son and the day care kids during our St. Patrick's Day party :)  I just used an empty oatmeal container and wrapped with paper and a green piece of poster board for the bottom.  They were on teams and had to stand back all around the hat.  Each team had different colored gold pieces (gold, green and purple)  They all threw their coins one at a time till all coins were thrown and then we tallied up each color.
                                                                            

Magic Magnets - if you can find some magnets for St. Patrick's Day.....these are great to make up songs with or let the children each make up a story during circle time.
                                                                

Songs


Snacks
( I think both of these were from Family Fun 2007)


You can also make rice crispy treats with Fruity Pebbles or Lucky Charms
You can search for the recipe to make the layered Rainbow Cake/cupcakes.

Hope this gives you lots of ideas to have a 
Happy St. Patrick's Day!!

You can also make the hat at the very beginning, using an empty
popcorn tin and shiny wrapping paper with a piece of
cardboard for the brim.  
Fill it with green necklaces, treat....such as those listed above or 
you can add Rolos (gold), ring pops, etc!

Leave a note from a leprechaun that snuck into your house or room
during the night and left a surprise for you to find.  Go on a hunt 
and find the hat with treasures and maybe a treat to eat for snack 
time!  So much fun to be had!

May the luck of the Irish...Always be with YOU!!


Sunday, July 22, 2012

ARRGGHHH!!! It's Pirate Week!

We absolutely LOVE pirate week!  All the kids like all the crafts, books, music, and the whole idea of being pirates for a week.  Have to say this is one of the teachers' favorite themes too!  It's just so much fun to shout out, "ARRGGHH Matey!"  for really NO reason at all  LOL
 Come along with us as I take you through a week of "Pirating"!

Books -  There are many, many books about pirates, but here are a few we enjoy!


              How I Became a Pirate  - Melinda Long
              A Pirate's Tale               - Alan Jardine
              Pirate Pete                     - Kim Kennedy
             Shiver Me Letters ABC  - June Sobel (great for when you add letters to your sand table)
              My Friend the Octopus  - Julian Defries
             A Pirate's Life for Me      - Julie Thompson
             Do Pirates Take Baths?   - Kathy Tucker
             Pirates Past Noon            - Mary Pope Osborne
             Pirates Don't Change Diapers  - Melinda Long

Every pirate needs a name, so during centers or playtime, call each child over to make a pirate name tag.
To make their name tags we used heavy cardstock.  We had printed a page with the pirate picture at the top and each child's name and left a blank area at the bottom for them to choose a picture and name.  Each child had a pirate job so these are some of the pictures they chose from:
  Have them glue their desired pictures and write their pirate name across the bottom.

Pirate Crafts

Our preschool is Monday - Thursday so we usually make a pirate item the first three days and then use all of our tools to hunt for treasure on Thursday.

Monday - PIRATE HATS

For each hat, take a sheet of black construction paper and fold in half.  Start at the top folded edge and draw down and out to make half of the pirate hat.  When you cut it out and fold out you have your whole hat.  Next, help your child put glue around the outside edges of the hat (staying inside about a fourth of an inch to avoid running off your paper.  Let them choose a color of glitter to sprinkle on the glue.  Next you can add any emblem to the center (pictures you have printed off, stickers, etc.  For the finishing touch (and it really does MAKE the whole hat.....add a colorful feather! Let these dry overnight then add a strip of black paper for the band.
The children wear these the rest of the week during school and will take home after our pirate party on Thursday.

Tuesday  -  SPYGLASSES/TELESCOPES

For your telescopes you will need:
         1 - Paper towel tube per child
         1 - Piece of foil about 6 - 7 inches wide
         1 - Colored tape or masking tape or black electrical tape will work too.
         Stickers, foam stickies, cut out pictures to glue, etc

Help each child roll their tube inside the foil.  Fold the excess end pieces tightly into the ends of the tube.  Use your tape to tape off ends and a line about 1/3 of the way down for your hand to hold.  Let them decorate with stickers.
These can be used the next few days to play games like:  I Spy, Have them hunt for different shapes throughout your room, Shout out a certain letter and see who can find it first.  Lots of ways to use your telescopes!

Wednesday - TREASURE MAPS

To start....we printed a coloring page with the pictures shown above for each child. We used the page find here:  http://kidsartactivity.com/treasure_map.html
Use a black marker to draw around each small picture and have the child cut out each shape.  Have them glue (use plenty of glue because these will get a little wet) each picture on.....making sure the ship and treasure X pictures or in opposite corners.
Once pictures are on, help them use a black permanent marker and starting at their ship...make a dotted line to show the path they should follow to find their treasure.  You can kind of guide them so it doesn't end up a scribbled mess  :o)
Once pictures are on, crinkle the paper up into a ball and then flatten out a little.
Your last step will be to add a couple of teabags to a shallow dish of water and let them steep a minute.  Then let the child use the teabags to stamp tea and water all over their map to give it an old weathered look.
Let dry and then use the next day for your hunt.  These will also roll up and can be stored inside their telescopes.

Activities:   

Pirates in Training!  NOT everyone can be a pirate!  

It takes a lot of hard work to become a pirate. You cannot expect to just step onto a ship and know what a pirate is supposed to do.  To get in shape, you must first complete PIRATE BOOT CAMP!


Set up a training obstacle course for your pirates.  These are some things we use:


Plastic slide  (for learning to climb ladders and rigging)
Wooden balance beam or board (to learn how to walk the plank without falling in to the sharks)
Tunnel (never know when you might have to Hit the Deck and crawl under some cannonball smoke)
Small table (sometimes pirates have to climb onto crates to get away from other bad pirates)
Hoops (You may find yourself having to hop through small fires if your ship is hit)


You can add whatever items you would like.  We set the whole thing up and then turn on some pirate music and have them follow in line and complete the course a few times before they can become REAL pirates!  If their foot falls off the balance beam, YIKES...they have been bitten by a shark and must go back to start and start over.  :o)
  
House Area:  
During pirate week, our house/kitchen area becomes the Pirate's Galley.  The children in this area must now cook for the pirates of the ship.  See what kind of creative names they can come up for the things they think pirates eat.  Do pirates eat normal foods or some crazy things like shark eyeballs, octopus tentacles, etc.

Sand Table:


Pirates LOVE to dig in sand! They are sure that if there is sand....there is GOLD!
Hide gold coins, gems, ABC letters (Shiver Me Letters book), necklaces, rings, etc and give the children little shovels and sifters to find as many things as they can.  You can also have them sort all of their treasure into categories and count to see of which item they have the most.

Pirate Eye Patch Game
You can find this game at, I think, Oriental Trading and other novelty stores, but I just drew my own onto a poster board and then laminated.  Cut out enough eye patches for each child (I laminated mine so I can just reuse instead of making each time).  I have a # on each of mine so they know which one is theirs.
Tie a pirate bandana or scarf over the child's eyes.  Slowly turn them around three times and then point in direction of the pirate face.  Give each child a turn and see who can get the closest to the outlines eye patch.

Hot Gold (Played like Hot Potato) We use a golden egg or gold coin.

Have children sit in circle...Indian Style or pretzel legs (whichever you prefer).  Their knees should be touching.  Play some pirate music and have them pass the gold.  They are NOT allowed to throw the gold into a person's hands...they must place it right into the next person's hands.  If they throw it to them...they are now out and must sit in the ocean with the sharks :o)  They also cannot HOLD onto the gold for too long (which pirates are known to try to do).  Those thieving pirates must also join the sharks :o)
Pause your music throughout the game and whoever is holding the gold when the music stops, must leave the game.  Scoot kids together once more and resume playing until only one left.
When it gets down to only 2 players we do this:  Have them sit facing each other with a foot or two between them.  When they get the gold, they must touch it to their chin first before placing in the other child's hands.  That way they are not just pushing it back and forth.

Pirate Patterning: Use foam pirate shapes (available at craft stores like Pat Catan's, etc) to pattern & sort.

Treasure File Folder game:  Have them match the correct # coins to the matching chest.
                       ( Just printed out pictures and glues on and laminated)


More Pattering:  Choose a few gems, and colored coins to put in a small chest.  Draw a picture of them and make pattern strips the kids can match and continue the pattern. 


Coin Sorting  Place pictures similar to these into the bottoms of 4 dishes and have children sort pennies,    nickels, dimes and quarters.


Pirate Finger Puppets:  These are just fun to play with or you can use them for addition and subtraction.
                                 Give them 3 to put on their fingers and then add two more....how many do they have?
                                 Now have them give you 4 and see how many they have left.

Pirate Memory:   Print out two copies of each picture card you choose.  You can find lots of pics online.
                              Laminate for longer use.  Lay the cards face down in short rows.  Take turns
                              flipping over two cards.  If they match...you get to keep.  If they don't, turn back
                              over in the same spot and the next person goes.  When all cards have been
                              matched, count your matches to determine a winner.


Make a Treasure Chest:   If you don't have some type of chest to use for your hunt.....you can easily make one out of a shoe box.  I used one that has an attached hinge-type lid.  Let kids glue some tan paper to the sides and top.  Add some paper straps, latch, and skull crossbones or whatever pirate pic to the top.

TREASURE HUNT DAY!  

It is finally the last day for pirate week and that means.....TREASURE HUNT  & PARTY!!!  HOORAY!

Before children get there, place clues throughout your room or school.  We send them to our school library and when they find the clue there it might say.  You must do 10 Toe touches before I tell you where to find the next clue or at the principal's office they might have to sing the ABCs.  You can think up clues to fit your group.  At the end of your hunt have your chest with a big red X on it, hidden in your room somewhere.  Have it filled with things like necklaces, Rolos (gold wrapped), Ring pops, pirate stickers or tattoos, mini Reeses Cups, etc.  We love these gold necklaces from Pat Catan's (they come in a pack of 12 for under $2.00)  The kid's love them.


To start your hunt.  When you are ready to start your hunt, just happen to "FIND" a note laying around your room from Captain Red Beard!  
 This is what ours said one year (to help you out):
Ahoy and shiver me timbers Mateys!

My name be Captain Red Beard and I
was scrounging around your classroom
last night looking for some gold!

But avast and rattle me bones --
Ye have none!!!

I felt bad for you lads and lassies so I
hid some of me OWN pirate booty in a
treasure chest somewhere in your building.

You must search for clues and 
follow the directions on them to
FIND THE GOLD!

The first clue can be found where you
Line up to go to the outhouse!

Good Luck Mateys!

Once you have found your treasure, divvy the booty up amongst your pirates for loot to take home.

For the rest of your party you can eat some snacks:

Here is a cool cake (From Family Fun magazine):
 
Pirate Mix :  Give each child some of each in a bowl & mix up

Pirate Peg Legs (pretzel sticks)
Cannonballs (Cocoa Puffs)
Gold coins (banana slice)

Pirate Ship Snack:  (I know the pic isn't very good, but I just drew it a second ago  LOL)


 Use a wide apple slice and a toothpick stuck in it with cheese cubes and a pirate flag attached.

You can also play pirate music while eating or play a pirate movie to watch while having snack!

Well.....I think that is quite enough stuff to get your Pirate Week or party off to a good start and help you have a fun time!

ARRGGHH Mateys!  Have a wonderful day filled with GOLD!